PREPARATION FOR INSTALLATION
Prior to installation read carefully the installation manual!
 Reception of goods
Check if all goods ordered and indicated on the waybill have been delivered. In case of possible damages, please immediately inform the seller of goods thereof and make respective note of the extension of damage or defects on the waybill.
Defective product should not be used!
We accept claims regarding the quantity and quality of goods supplied within 7 days of delivery of goods. Ask for information on terms and conditions of warranty for goods in AS Toode sales offices or on our website under section “technical information”. The damage caused by transporting is the liability of transporting service provider. AS Toode is not liable for expenses entailed by substitution of products installed contrary to the installation instructions.
Maintenance and storage of goods
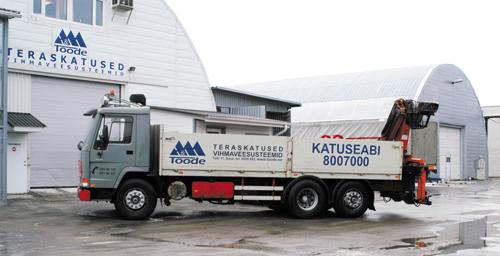
The sheets are unloaded from transport onto a base in the construction site, which is a dais at least 20cm high from the ground and made of cross girders placed at least a meter?s distance from behind. It is advisable to transport plates with derrick crane car. The sheets are generally packaged in the factory and are therefore easily liftable with the crane and frame. If no crane at your disposal, the plates should be lifted one by one. At this point, one should avoid the friction of sheets ? they should be lifted, not pulled! The sharp cut edges of sheets can damage the finish coating of an underneath sheet.
Thin steel sheets may bend slightly, which is why they are to be handled with caution. Besides, the sheets are easily stretched. Sheets cannot be lifted being held by the two ends only! The sheets can be lifted to the roof using stable support beams and lifting these at many places. Possible scratches and other surface coating defects are removed with special aerosol paints.
Zinc-coated sheets should not be stored in the outside conditions while being tightly packed. The sheets should be protected against direct precipitation. The accumulation of water and humidity between the sheets should be avoided.
The coloured and plastic-coated sheets can be stored unpacked within up to fortnight. For longer periods of storage follow the rules for zinc-coated sheets.
Processing of sheets and preparation for installation
The sheets are delivered to the client in ordered dimensions. All possible sloping cuts, antenna inlets etc. are made on the site during the installation. The sheets can be cut with compass saw, tin cutter or hand puncher. By no means can cutting disc be used, as the sparks generated by sawing burn the protective layer of the sheet! The steel crumb remaining after processing the sheets has to be carefully cleaned with a brush. The crumb if it remains on the surface will rust and may cause damage to the sheet surface. The sheets that got wet can be cleaned with domestic detergents, solutions, but do not use strong chemicals.


Underlay
The sheets and tiled profiles require underlay to be used, which would prevent the absorption of condensation water in the underlying structure of the roof and protect it against precipitation during construction. The underlay is fastened to the rafter with a distance piece. It is important that the underlay is not tightly stretched but lies free. The underlay is ceased at the ridge.
Batten
For roofing sheets, 100x25mm cross-sectional boarding is used (if rafters spacing <900mm). The more accurate data on spacing of batten depends on the choice of the profile, on the roof pitch angle, load. The batten is nailed down above the distance piece holding the underlay with hot-dip zinc-coated nails. When making the batten one should provide for the installation of possible inlets (trapdoors, ventilation pipes, etc.). For inlets and valleys, full boarding should be installed in the future. The valley pieces are made of flat tinplate and mounted prior to the installation of cladding sheets. If needed, valley filler can be later used.
The batten spacing depends primarily on the choice of the profile. For more specific drawings and dimensions see the installation manuals for profiles.
Fastening accessories
For fastening, roofing strews with washer are used. The screws are driven in with an electric drill. The cladding sheets are fastened at the bottom edge of the wave of the corrugated sheet. Usual length of screws in such fastening is 25-28mm. In the overlapping either shorter screws or rivet fasteners are used for better result. The amount of screws is approximately 7 pc/m2 (the figure includes also the necessary amount for fastening the ridge capping, end and other such pieces). The sheets are fastened one besides another at each purlin or at least at every 400 mm.
Flashings
Ridge cappings are either flat (dimensions 150x150mm) or round. Between the ridge capping and the profile, a ridge filler compatible with the profile is installed. The ridge filler is indispensable in the windy environment and for roofs with low pitch angle. The ridge flashings are fastened with screws at each wave of corrugated sheets through a washer. For hipped roofs, round ridge cappings are supplemented with Y-pieces and special end-pieces for hipped roofs. Often it is reasonable to make the Y-piece on the spot, as the standard part may prove incompatible with the actual roof pitch angle.
End-pieces are fastened to the purlin and the corrugated sheet with screws. It is important to observe the rules of correct installation of the underlay!
